- Sun 01 April 2018
- Mechanical keyboards
- #keyboard, #mechanical, #dz60, #cherry, #stabilizer, #pcb, #plate, #case, #switch, #layout
This is my first mechanical keyboard build. I might be wrong or do some weird choices, but eventually this helps people that are like me and feel a bit lost in the information overflow and chaos on that topic. Although the article relates to my DZ60 build, most of the information is valid for other hardware.
The goal
... is to end up with a working 60% mechanical keyboard. These components are required, amongst other optional things like switch films, dampening case foam etc.:
Required:
- PCB (printed circuit board): the brain of your keyboard, could have RGB lighting
- Stabilizers: they balance key presses along wider key caps like
Backspace,Caps Locketc. - Plate (optional): sits on top of the PCB and supports the switches while changing the sound and feel
- Switches: They are soldered to the PCB and define how resistant the switch is on a keypress
- Keycaps: well, those are the plastic thingies you're typing on
- Case: houses all the other components
- USB cable: a plus when building your own keyboard is, that the USB cable is detachable
A good place covering the details is the Deskthority wiki. More information on the individual components below.
Components
PCB
My main reasons to buy a DZ60 are:
- Versatility: many layouts to choose from (I love the split space option)
- RGB underglow. I'll probably use it to indicate layers and special keys like
Caps Locketc. - Open source firmware: QMK
- USB Type-C: I'm a bit paranoid of damaging the PCB connector, so USB Type-C lowers that risk in my opinion
Stabilizers
One can choose between PCB- or plate-mounted stabilizers of various brands. If you get a universal plate, usually you need PCB-mounted stabilizers. If you plan to use a split space bar, you need to order additional 2u stabilizers (see section "Bill of materials").
According to broad agreement on the interwebs, original stabilizers from e.g. Durock or Cherry seem to have stable build quality where other clone brands vary in quality.
Plate
Plates come in at least 4 different materials: Aluminium, steel, brass or carbon fiber. Brass ones are the most expensive amongst those. I don't know anything about the differences or if you can even feel any. Also important: the plate in combination with the PCB dictate what layout options you have (e.g. split space bar/backspace/shift).
Switches
Switches can be mounted by two methods: either plate-mount or PCB-mount. The difference is visible here: wasdkeyboards.com. Plate-mounted ones have a firmer typing feel, while PCB-mounted switches feel bouncier and have more flex.
You can reuse PCB-mount switches on a plate by cutting the two guide pins at the bottom.
Keycaps
Choose whatever you like. Using keyboard-layout-editor.com helps you with decisions regarding the layout, required key caps/switches etc.
Case
It seems the DZ60 fits any standard 60% case.
USB cable
Obviously you can simply choose a standard USB cable. If you're building your own keyboard, chances are, that you might want a pretty cable. I know Pexon and Clark Kable that assemble cables to your needs.
Some important bits of information
These bits we're quite hard to find, as I either found no or inconsistent information on the Internet.
- DZ60: The stabilizers are PCB-mounted, not plate-mounted
- DZ60: Plate layout A is for a 2u left
Shift, layout B has a 2.25u leftShift
Bill of materials
Note that by living in Europe, some parts can be hard to come by (Krytox lube) and/or shipping fees are more expensive than the ordered components themselves. Here's a list of the shops I bought my stuff from:
| Part | Count | Europe | North America | Asia | Note |
|---|---|---|---|---|---|
| DZ60 rev. 3.0 PCB | 1 | - | - | KBDfans | KBDfans is also on AliExpress |
| DZ60 case foam | 1 | - | - | KBDfans | |
| Screw-in stabilizers | 5 | - | 1upkeyboards | KBDfans | I need 5x 2u b/c split space |
| Plate | 1 | - | - | KBDfans | brass plate w/ layout A |
| Kailh Pro Purple switches | 68 | - | KONO | - | Plate mounted |
| Deskeys switch films | 120 | - | NovelKeys | - | 0.3mm |
| SA Pulse keycaps | 64 | - | - | - | Grab bags + Oh, Keycaps! |
| Extra keycap for split space | 1 | - | Pimp My Keyboard | - | 1x 2.75u |
| Tofu 60% case | 1 | - | - | KBDfans | |
| USB-C cable | 1 | Pexon | - | - | Coiled, Paracord 550 |
Build log
Test the PCB
It's recommended to test PCB functionality before soldering anything. This helps to rule out PCB errors if you encounter errors after soldering.
- Plug your PCB into your computer
- Go to keyboardtester.com or use VIA
- Hit the two pads for each switch with tweezers (just use something conductive)
- Repeat for each key and make sure all contacts are registering
Lubing the switches and stabilizers and filming
Although those things are completely optional. it really makes an audible difference: your keyboard will be much more pleasant to type on, as it will rattle less and offer a more uniform typing feeling. I won't go into details about what kind of lube to use, that is already covered extensively. Make sure to lube switches and stabilizers.
Mounting stabilizers on the PCB and the "band-aid mod"
First, make sure you have enough stabilizers: you need one for any key ≥ 2u. So in my case with the split space bar layout:
- 1 for
Backspace - 1 for
Left Shift - 1 for
Enter - 2 for split space bars
Make sure to mount the stabilizers correctly. The wire points to the bigger holes:
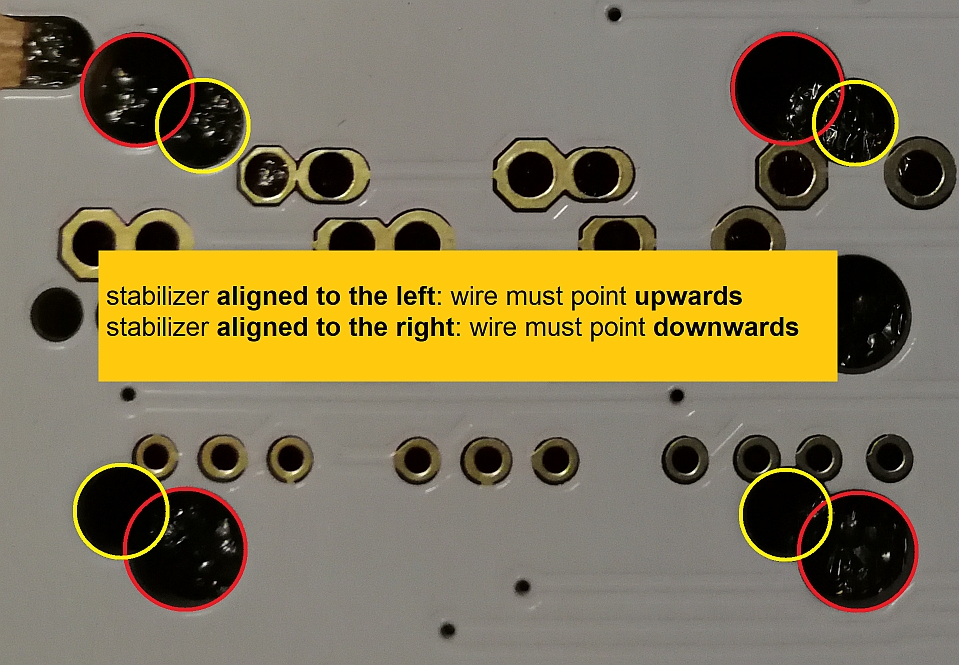
If you're unsure where to put a stabilizer, softly mount a keycap on a switch and gently put these on a stabilizer to perform a test fit. Also, double-check that the wire is correctly plugged in, so moving one keycap receiver should lift the other one too.
It seems one can reduce wobbling by adding band-aid or some other dampening and sticky tape between the PCB and stabilizers:
Source: Reddit
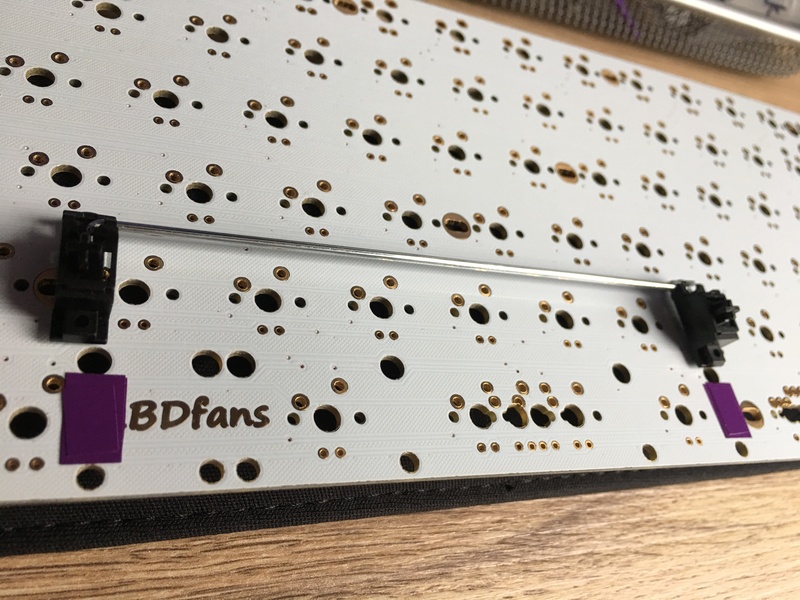
Adding the plate
After you've placed all stabilizers, mount the plate over it. It should align nicely with the stabilizers.
Add some switches
Important: Make sure you know the exact position for every switch, as the location can vary depending on the chosen layout. If unsure, just mount all the switches before soldering and test-fit the keycaps you are unsure of the exact location.
Switches & soldering
- Set your soldering iron to a temperature between 350-370 °C (exact temperature can vary)
- Plug some switches at the corners and the center of your plate
- If the plate is not flush with the switches: gently clamp the edges down with some kind of spring clamps
- Don't keep the iron on the solder spots any longer than necessary
- Solder the first few switches
- When done, add the rest of the switches and solder
- Test any key thorougly with e.g. typings.gg or VIA. Re-solder any faulty key
Flashing
I prefer to use QMK Toolbox. Just load the desired keymap firmware and power your keyboard while holding Space + b to flash. If this does not work, hit the reset button on the back of the PCB while connecting the USB cable.
Programming
I learned my lesson after flashing my faulty layout too early. That's how it went:
I flashed a generic QMK firmware for DZ60 from qmkeyboard.cn. That was not a bad idea. But I got a bit impatient, as the layout was shifted and I halfway prepared my own QMK keymap. So I flashed that one and noticed that the "g" and "b" key did not work because of cold solder joints. No big deal? Well, you're out of luck when you forgot to add a "reset" key as one cannot flash firmware anymore. Bottom line: the following procedure helped me get back to a usable state:
- Remove the faulty solder and resolder
- Reset the DZ60 by shorting the two pins called "RESET" (near the ATmega32U4 controller/near the rev1 reset switch)
- Flash a working firmware
- Make sure your next firmware has a reachable "b" and/or reset button
So, please read the QMK documentation - it's detailed and explains almost any step required to create your own layout.
I made a custom layout - see the README for details: github.com/qmk/qmk_firmware. The hardest part for me was to realize that your layout obviously needs to base on a physical wiring configuration. See github.com/qmk_firmware and select the layout that matches your desired setup.
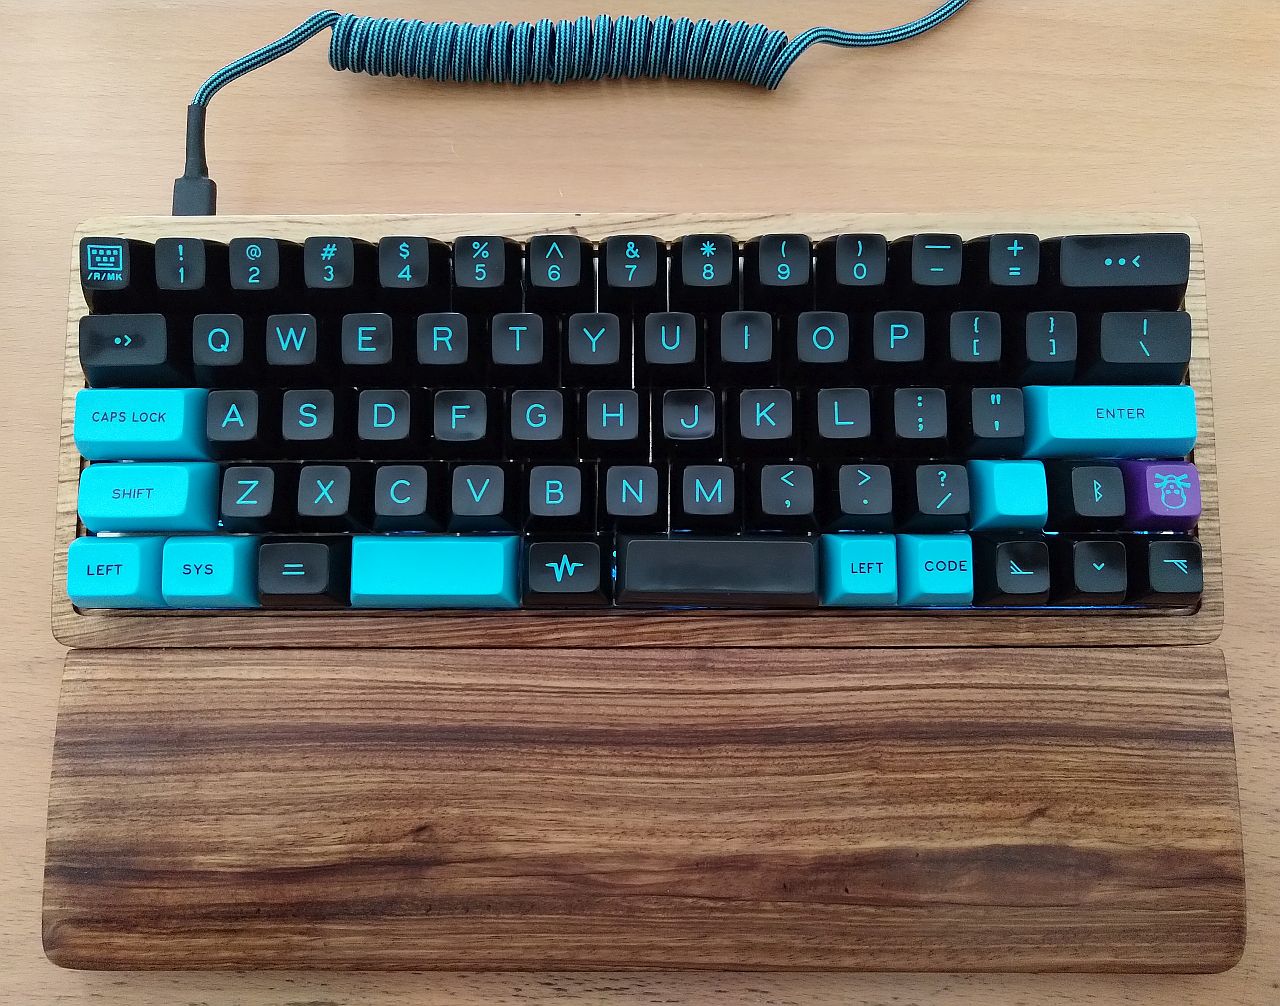
Final photo