- Fri 18 November 2022
- Home automation and IT infrastructure
- #homeassistant, #tasmota, #3dprint, #wifi, #smartplug, #homeautomation, #delock, #mqtt, #raspberrypi
Disclaimer: those are first steps, take them with a grain of salt. Some things might be insecure, non-best-practice or might even render hardware useless.
What have I achieved and why might this be of interest to anyone?
If you can identify with at least one of these points, you might be interested:
- You run a remote 3D printer with OctoPrint for example in your basement
- You want to remotely toggle some (e.g. 3D printer) lights or other device via WiFi
- You have only poked the home automation resp. "smart home" topic with a stick so far and are interested in solutions that are independent from cloud technology, and/or are not tied so some crappy app 🤮 Because, if someone breaks your shit, it better be yourself, right?
So what did I implement? Basically: I setup Home Assistant on a Raspberry Pi 4, connected it to a MQTT server, bought a smart power plug (Delock 11826) and configured it so Home Assistant can toggle it either manually or with some automation.
The information below is not an introductionary explanation, but might help you to fill blanks around topics that are a bit hard to grasp initally.
- What have I achieved and why might this be of interest to anyone?
- Get Home Assistant on a Raspberry Pi 4
- MQTT server installation and configuration
- Update the firmware on the smart plug (Delock WLAN Power Socket Switch MQTT 11826)
- Configure the MQTT client on the Delock plug
- Configure a Home Assistant automation to switch on lights when 3D prints start
- Operational topics
Get Home Assistant on a Raspberry Pi 4
Your mileage may vary, but the current Raspberry scarcity and price increase led me to the decision to use a generic Linux distribution and run Home Assistant in Docker. This allows me to to not depend too much on a specific hardware platform, and also use the Pi for other things than home automation (bad practice).
So, I installed Raspbian resp. Raspberry Pi OS and then followed the official documentation for a containerized Home Assistant installation.
For the things I had to improvise on, I left some notes below.
Docker installation
Please note that by using the Docker version of Home Assistant, you won't be able to install add-ons. In order to estimate if that's a problem for you, here's an overview of available add-ons.
# Install Docker the cringe way
curl -fsSL https://get.docker.com -o get-docker.sh
sudo sh get-docker.sh
Raspberry Pi 4 Docker image
docker run -d \
  --name homeassistant \
  --privileged \
  --restart=unless-stopped \
  -e TZ=MY_TIME_ZONE \
  -v /home/pi/ha:/config \
  --network=host \
  ghcr.io/home-assistant/raspberrypi4-homeassistant:stable
Some of these parts were shamelessly stolen and adapted from lazyadmin.nl. Thanks.
MQTT server installation and configuration
TBD, for the moment consult lazyadmin's blog post.
Update the firmware on the smart plug (Delock WLAN Power Socket Switch MQTT 11826)
Delock preflashes the plug with an old Tasmota 6.x firmware. This version is too old for some reason I forgot. I upgraded to 12.0.2.3 and had no issues, YMMV. Here's the procedure:
- Flash Tasmota 7.2.0 from Delock: lugh.ch/tasmota/11826de.bin or lugh.ch/tasmota/11827de.bin
- Flash Tasmota 8.5.1: lugh.ch/tasmota/tasmota-8.5.1.bin.gz
- Flash current Tasmota: ota.tasmota.com/tasmota/tasmota.bin.gz
Source: atlane.de
Configure the MQTT client on the Delock plug
See the Tasmota MQTT docs.
Configure a Home Assistant automation to switch on lights when 3D prints start
In Home Assistant, go to Settings -> Devices & Services -> Integrations and configure the OctoPrint one. If not done yet, also configure the Tasmota integration for your smart plug.
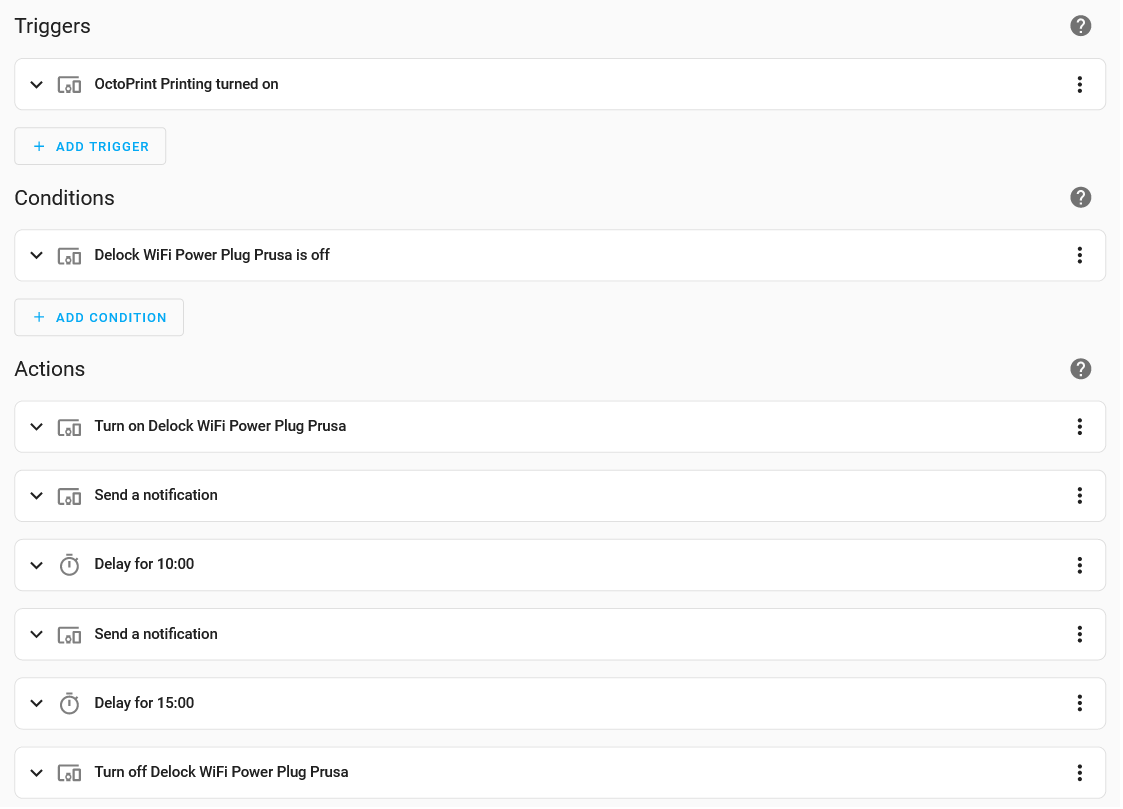
Graphical
See the details in the YAML version just below.

YAML
alias: Turn on 3D printer lights for the first 15 minutes of a started print
description: ""
trigger:
  - type: turned_on
    platform: device
    device_id: <octoprint-deviceID>
    entity_id: binary_sensor.octoprint_printing
    domain: binary_sensor
condition:
  - condition: device
    type: is_off
    device_id: <delockplug-deviceID>
    entity_id: switch.delock_wlan_switch_11826
    domain: switch
action:
  - type: turn_on
    device_id: <delockplug-deviceID>
    entity_id: switch.delock_wlan_switch_11826
    domain: switch
  - device_id: <mobile-deviceID>
    domain: mobile_app
    type: notify
    message: "LED lights have been turned on "
    title: Prusa lights on
  - delay:
      hours: 0
      minutes: 10
      seconds: 0
      milliseconds: 0
  - device_id: <mobile-deviceID>
    domain: mobile_app
    type: notify
    title: Prusa lights off in 5m
    message: Light is switched off in 5 minutes
  - delay:
      hours: 0
      minutes: 15
      seconds: 0
      milliseconds: 0
  - type: turn_off
    device_id: <delockplug-deviceID>
    entity_id: switch.delock_wlan_switch_11826
    domain: switch
mode: single
Operational topics
No, using Docker does not mean you can stop caring about maintenance.
Upgrading a Docker Home Assistant installation
See the official Home Assistant docs and adjust for Raspberry Pi:
docker pull ghcr.io/home-assistant/raspberrypi4-homeassistant:stable
docker stop homeassistant
docker rm homeassistant
[docker run command some headings above]
